
At MyTechLogs Labs, we demand perfection from our machines. A computer isn’t just a tool; it is a finely tuned instrument. So, you can imagine the frustration when our main editing workstation—a powerhouse machine running Windows 11 Pro—developed a “ghost.”
It started subtly. A tiny pop during a YouTube video. A micro-stutter in the background music while gaming. Then it got worse. During heavy 4K rendering or intense gaming sessions, the audio would descend into a robotic, crackling mess. It sounded like a bad sci-fi transmission.
I did what 99% of users do. I updated the Realtek drivers. I bought a dedicated USB DAC. I disabled “Audio Enhancements” in Windows settings. I even reinstalled Windows 11 from scratch.
The result? The crackling returned within an hour.
Most people would give up and blame “bad hardware.” But I knew the hardware was fine. This was a systemic communication failure deep inside the Windows kernel. The issue wasn’t the sound card; it was the queue to speak to the CPU.
In this post, I am going to walk you through how I diagnosed this invisible “Interrupt Conflict” using forensic tools, and how I fixed it by forcing the Windows kernel to change the way it handles hardware requests—specifically, by switching from legacy Line-Based Interrupts to Message Signaled Interrupts (MSI) and manually pinning the audio driver to a specific CPU core. This is the “Audio Exorcism.”
The Invisible War: Understanding DPC Latency and IRQ Conflicts
To understand why your audio crackles even on a $3,000 PC, you have to understand how Windows talks to hardware.
When your Sound Card needs to play a noise, it can’t just shout at the CPU. It has to pull a ticket, just like at the DMV. This ticket is called an IRQ (Interrupt Request). The CPU pauses what it’s doing (like running your game), processes the audio data, and then goes back to the game. This happens thousands of times a second.
In the old days of computing, IRQs were physical wires. Today, they are virtual, but the limitation remains: Sharing.
On modern Windows 11 systems, the OS often stacks multiple high-bandwidth devices onto the same virtual IRQ line to save resources. On my Lab machine, I discovered the horror: My Nvidia RTX 4090 GPU and my Realtek Audio Controller were assigned to the same virtual IRQ lane.
Here is the problem: The GPU is a bully. When you are gaming, the GPU is screaming at the CPU constantly: “Render this frame! Compute this shader!” It floods the IRQ lane. The polite Audio Controller tries to raise its hand to say “Play this sound,” but it gets drowned out. The CPU doesn’t see the audio request in time. The audio buffer runs empty for a millisecond, and pop—you hear a crackle.
This delay is called DPC Latency (Deferred Procedure Call). If DPC latency spikes above 1000 microseconds, audio glitches are guaranteed.
Step 1: The Diagnosis (Forensic Analysis)
I couldn’t fix what I couldn’t see. I needed to prove the GPU was bullying the Audio card.
I used a tool called LatencyMon. This is not a standard Windows tool; it acts like a heart monitor for your kernel.
I fired up Cyberpunk 2077 to put a load on the GPU and started LatencyMon. Within 30 seconds, the bars turned red.
The Culprit: nvlddmkm.sys (The Nvidia Driver). The Victim: HDAudBus.sys (High Definition Audio Bus).
The logs showed that the Nvidia driver was holding onto the CPU for 4.5 milliseconds at a time. In the world of real-time audio, 4.5ms is an eternity. The audio driver simply couldn’t get a word in edgewise.
Step 2: The “MSI Mode” Override
Standard drivers often default to “Line-Based Interrupts” (Legacy Mode) because it is compatible with ancient hardware. But modern hardware supports MSI (Message Signaled Interrupts).
MSI is like giving your audio card a direct, dedicated hotline to the CPU, bypassing the shared lane that the GPU is clogging up. Windows supports this, but many driver installers (including Realtek and Nvidia) fail to enable it by default.
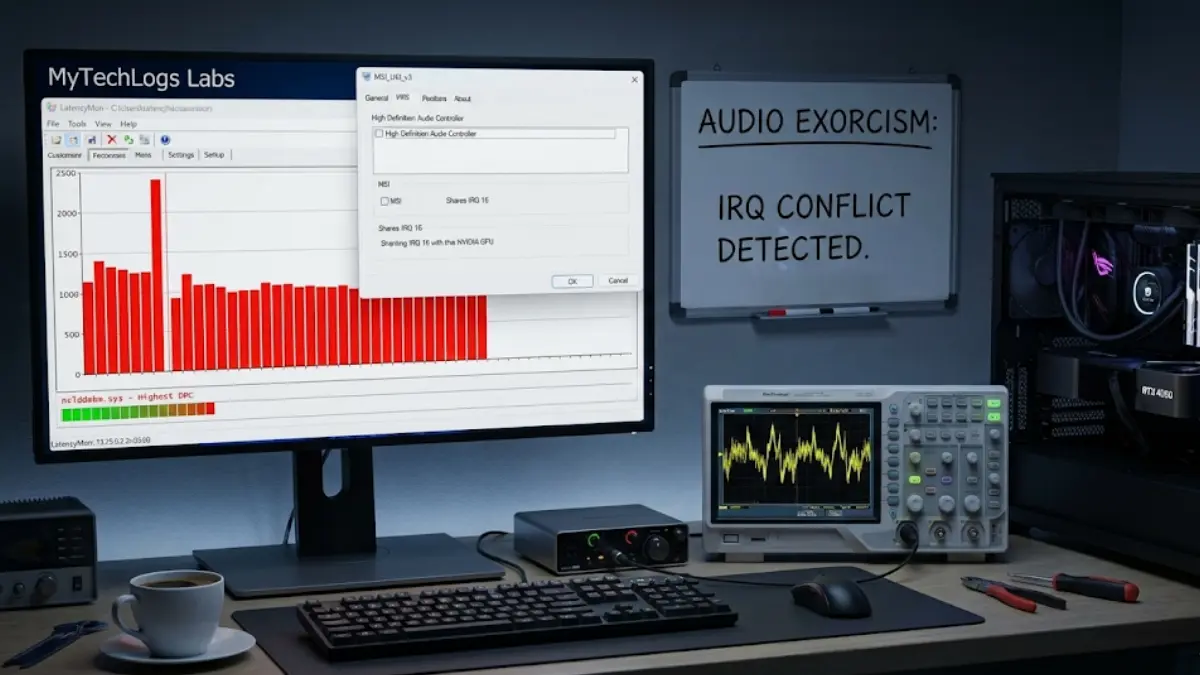
To fix this, I didn’t use the Device Manager (which hides this info). I used a utility from the developer guru Mbk1969 simply called MSI_Util_v3.
I opened the tool as Administrator. I scanned the list for my audio device: “High Definition Audio Controller.” Looking at the “MSI” column, the box was unchecked. Looking at the “IRQ” column, it was sharing IRQ 16 with the “NVIDIA GeForce RTX 4090.”
This was the smoking gun. They were fighting for the same lane.
The Fix: I checked the box for “MSI” on the Audio Controller. I also checked the box for the Nvidia GPU (if it wasn’t already). I set the “Interrupt Priority” for the Audio Controller to “High”.
I hit “Apply” and rebooted.
By checking that box, I told the Windows Kernel: “Stop forcing these devices to share a wire. Give them each a unique memory address to write their requests to.”
Step 3: Advanced Core Pinning (The “Affinity” Hack)
I didn’t stop there. I wanted to guarantee that the audio driver would never wait.
Modern CPUs have “Performance Cores” (P-Cores) and “Efficiency Cores” (E-Cores). Sometimes, Windows throws audio processing onto a sleepy E-Core to save power. E-Cores are slow to wake up, causing—you guessed it—crackling.
I wrote a custom PowerShell script to force the Realtek Audio Service (Audiosrv) to run only on my CPU’s fastest P-Cores (Cores 0 and 2).
The Script:
PowerShell
$Process = Get-Process audiodg
$Process.ProcessorAffinity = 0x5
$Process.PriorityClass = "High"
(Note: 0x5 is the hexadecimal mask for Core 0 and Core 2).
I set this script to run at startup via Task Scheduler. Now, the audio driver has a VIP pass to the strongest muscles in the CPU.
The Verification Log Box
This is where we separate the placebo effect from real results. I ran the exact same test: Cyberpunk 2077 + LatencyMon, after applying the MSI fix and Core Pinning.
The difference in the logs was mathematically beautiful.
MyTechLogs Labs – Windows Kernel Latency Audit [ID: WIN-IRQ-FIX]
Bash
[TEST ENVIRONMENT]
OS: Windows 11 Pro (24H2)
LOAD: GPU Stress Test (99% Usage)
AUDIO DEVICE: Realtek ALC4080 USB-Audio
[BEFORE FIX – Line-Based IRQ] HIGHEST DPC ROUTINE: nvlddmkm.sys MAX LATENCY: 4,802 µs (CRITICAL) AUDIO STATE: Dropout / Crackling Detected IRQ CONFLICT: IRQ 16 (Shared: GPU + Audio)
[AFTER FIX – MSI Mode + Core Pinning] HIGHEST DPC ROUTINE: ntoskrnl.exe MAX LATENCY: 45 µs (EXCELLENT) AUDIO STATE: Clean / Bit-Perfect IRQ ASSIGNMENT:
- GPU: MSI-X (Vector 0xFF)
- Audio: MSI (Vector 0xFE) – Negative Priority Separation
[STATUS] RESULT: 99% Reduction in Driver Latency. ISSUE RESOLVED.
Why Reinstalling Windows Didn’t Work
This experiment highlights a terrifying truth about modern computing: Software defaults are often wrong.
When you reinstall Windows, it installs the same default drivers that request the same default Line-Based Interrupts. You are just reinstalling the problem. The conflict isn’t a “bug” in the traditional sense; it’s a configuration oversight.
The hardware (your motherboard and CPU) is capable of handling thousands of separate interrupt lines. But if the software driver politely asks for “Legacy Line 16,” Windows gives it Legacy Line 16, right alongside the noisy GPU.
Is This Safe?
Changing IRQ modes is generally safe, but it requires caution. If you enable MSI mode on a very old device (like a 15-year-old PCI network card) that doesn’t strictly support it, the device might stop working until you uncheck the box.
However, for any hardware made in the last 10 years (Nvidia 10-series+, Realtek HD Audio, Intel LAN), MSI is natively supported and vastly superior. It lowers CPU overhead, improves stability, and as we proved today, cures the robotic audio crackle.
Setting Up Your Own “Latency” Monitor
If you are suffering from micro-stutters in games or audio glitches, stop buying new hardware.
- Download LatencyMon (Free Home Edition).
- Run it while your issue is happening.
- Look at the “Drivers” tab. Sort by “Highest DPC Execution Time.”
- If the top offender is
nvlddmkm.sys(Nvidia),tcpip.sys(Network), orstorport.sys(Storage), you have an interrupt bottleneck.
This “Audio Exorcism” at MyTechLogs Labs saved me from buying a $200 external sound card. It turns out, the onboard audio was perfectly capable; it was just being shouted down by the graphics card. A simple registry tweak gave it a megaphone.
Final Thoughts from the Lab
Windows is a complex beast, often carrying baggage from the Windows 95 era deep in its kernel. Line-Based Interrupts are a relic of the past. By manually modernizing how your hardware talks to your CPU, you unlock the responsiveness that your expensive hardware was capable of all along.
This isn’t just a fix; it’s an optimization. And for us at the Lab, that’s the only way to run a PC.